Ever found yourself stuck with a Maytag washer that simply won’t start because of a pesky lid lock? Frustrating, isn’t it? As an appliance repair expert, I’ve tackled this issue countless times for myself, my neighbors, and my clients. Today, I want to share the secrets I’ve learned along the way about Maytag washer lid lock bypass.
A malfunctioning lid lock can be a real headache, especially when all you want is clean clothes. You might think it’s a job only for the pros, but with a bit of guidance, you can bypass the lid lock on your Maytag washer yourself. This article will guide you through the process, step by step.
Table of Contents
How to Bypass Lid Lock on Maytag Washer
Ever had your washing machine refuse to open once it starts its cycle? It’s like it’s holding your clothes hostage! Fear not, for I have a nifty trick to help you bypass that pesky lid lock. Whether you’re troubleshooting or just curious, this guide will walk you through the process step-by-step.
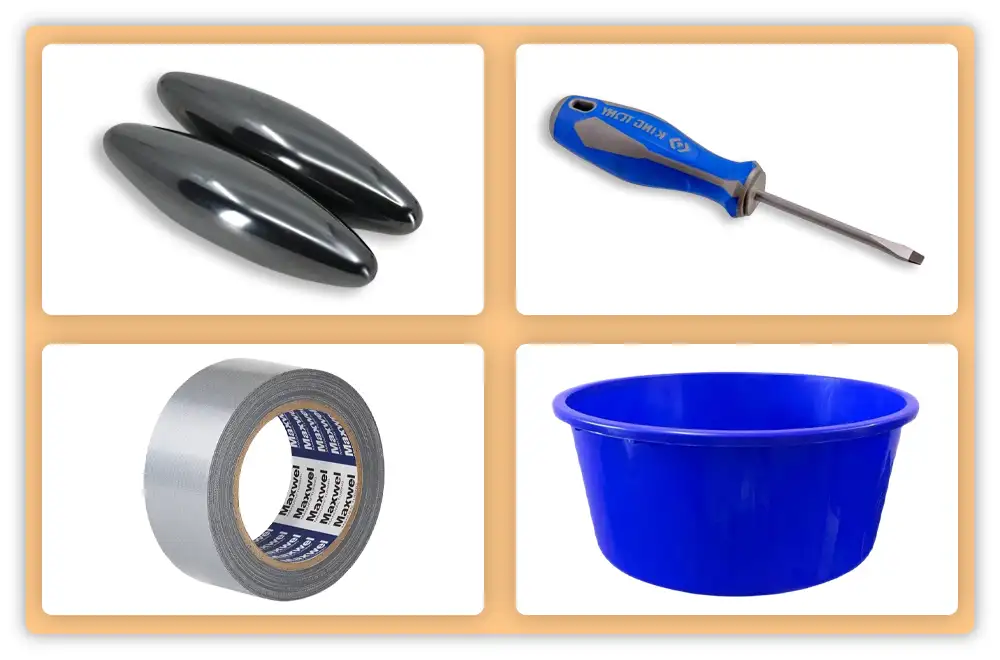
Tools You’ll Need
Step-by-Step Guide

Step 1: Unplug Your Washer
Safety first! Unplug your washer from the outlet to avoid any risk of electrocution. If the washer was recently used, wait at least an hour for it to cool down completely. Trust me, a little patience can save a lot of trouble.
Step 2: Drain the Water from Your Washer
Although optional, draining the water from your washer is highly recommended. This makes the process safer and less messy. You might also want to shut off the water supply or disconnect the water connection.
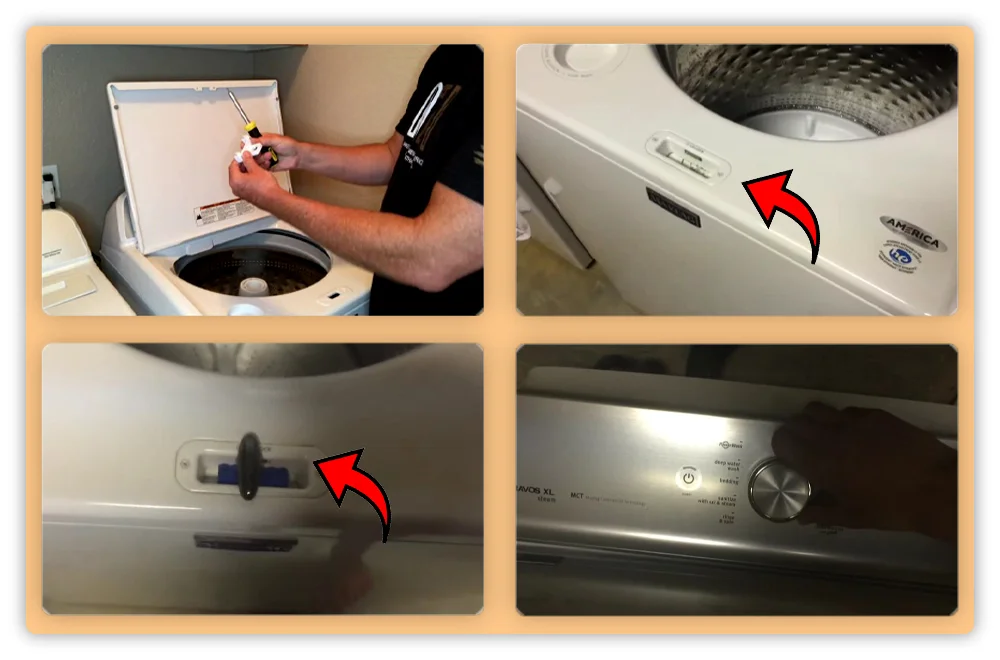
Step 3: Open the Top Panel of Your Washer
Check your washer’s manual to get familiar with its parts. Once you’re ready, remove the top panel using your screwdrivers and lift it up.
Step 4: Locate the Lid Lock Switch
The lid lock switch is usually a gray or black plastic piece that prevents accidents by keeping the washer safe.
Step 5: Place a Magnet on Top of the Switch
Find where the lid lock meets the top of your washer. Place the magnet’s attractive side down on the switch and secure it with duct tape. This trick convinces your washer that its lid is shut, allowing it to run and spin even when the door is open. This method works well on maytag washer lid lock bypass top load models.
Step 6: Replace the Top Panel of Your Washer
Carefully put the top panel back in place and ensure all screws are properly secured.
Step 7: Test Run Your Washer
Give your washer a test run to see if it’s working. If it doesn’t work, adjust the magnet’s placement.
Safety Warnings and Professional Recommendations
- Safety First: Bypassing the lid lock mechanism can be risky. Be aware of potential injuries or water damage. Always unplug your washer before starting any repair work.
- Professional Help: This is a temporary fix. For a permanent solution, consider getting the lid lock mechanism repaired by a professional to ensure everything is working safely and correctly.
- Avoid Wire Cutting: While some guides suggest cutting wires, this is a permanent and potentially dangerous fix. It’s best to leave such modifications to professionals.
Why Bypassing the Lid Lock Might Be Necessary on a Maytag Washer
Sometimes, bypassing the lid lock on a Maytag washer can help solve problems quickly and make maintenance easier. Here’s why it might be necessary:
Troubleshooting
When my Maytag washer stopped working one day, I was baffled. The cycles wouldn’t start, and I had no idea why. After some research, I discovered that bypassing the lid lock could help figure out the problem. It was like finding a key to a mystery, letting me see what was wrong inside the machine.
Immediate Access
Imagine this: you’re rushing to get ready for an important event, and your washer decides to keep your clothes locked inside. This happened to me, and I panicked. By bypassing the lid lock, I got my clothes out just in time. Sometimes, you need quick access to your washer, and this trick can really save the day.
Convenience
Washing machines can be tricky to fix. One time, my washer wouldn’t drain properly, and I needed to clean out a blockage. Bypassing the lid lock made it so much easier to get inside and fix the issue. It felt like having a special tool that made the repair job faster and simpler.
Safety Considerations
Safety is always important. Once, my washer started making a strange noise and smelled like something was burning. I knew I had to check it right away. Bypassing the lid lock allowed me to open the door quickly and see what was happening. It turned out to be a small problem, but acting fast prevented a bigger issue. It’s good to know how to open the washer in an emergency to keep everyone safe.
Conclusion
Bypassing your Maytag washer’s lid lock can be a handy fix when you’re in a bind. In this guide, we’ve walked through the steps to safely do a Maytag washer lid lock bypass.
Remember, while this DIY solution can be helpful, it’s important to be careful and stay safe. Following the steps closely is crucial. If you’re not comfortable with repairs or if the problem keeps happening, getting help from a professional is always a good idea.
If you have any questions about how to bypass the lid lock on your Maytag washer, just comment below or contact us for more help.
FAQ
Can you override the lid lock on a Maytag washer?
Yes, you can override the lid lock on a Maytag washer. One simple way is to use a strong magnet placed over the lid lock area to trick the washer into thinking it’s closed.
How to reset a Maytag Centennial washer?
To reset a Maytag Centennial washer, unplug it for 3-10 minutes to dissipate the electrical charge. For a deeper reset, use the diagnostic mode and calibration cycle as outlined in your washer’s manual.


