Is your GE washer not draining, leaving you with a load of wet clothes? You’re not alone. As a home appliance repair expert, I’ve faced this challenge many times for myself, neighbors, and clients. This guide covers the most common reasons for GE washer drainage issues and provides step-by-step solutions to help you troubleshoot and fix the problem quickly and easily.
Table of Contents
Step-by-Step Guide for a GE Washer Not Draining
If your GE washer not draining properly, follow these steps to identify and fix the issue. Here’s a detailed guide to help you troubleshoot the problem effectively:
How to Inspect and Clear a GE Washer Drain Hose
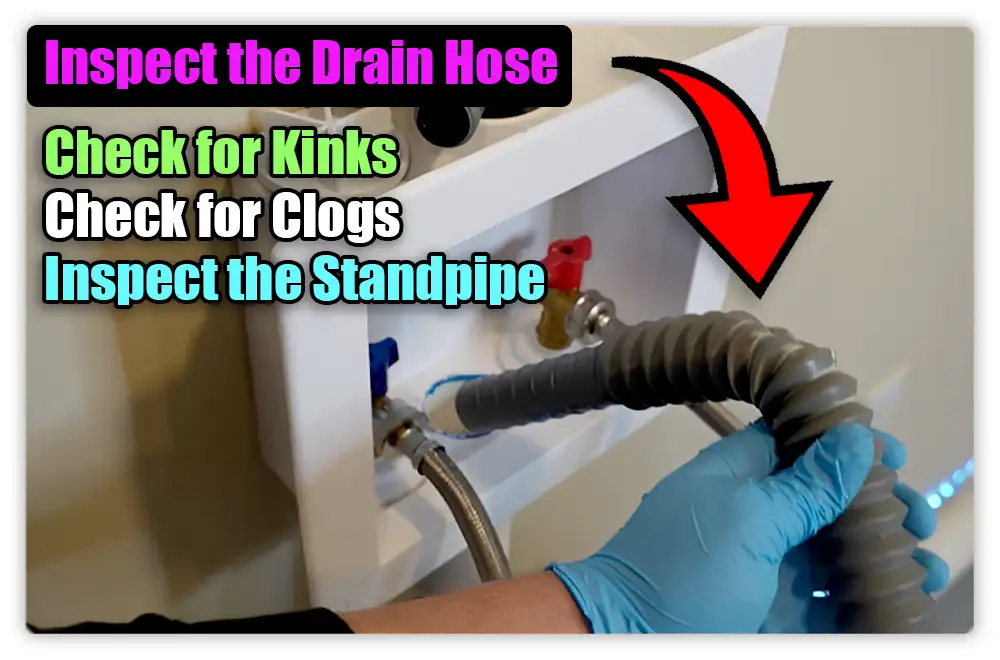
First, let’s start by inspecting the drain hose. This might seem simple, but it’s often the cause of your GE washer not draining.
Check for Kinks: Begin by looking at the hose to make sure it isn’t kinked. Imagine trying to drink from a straw that’s bent; it’s just not going to happen. A kinked hose can stop water from flowing freely, causing drainage issues.
Check for Clogs: Next, disconnect the drain hose from both the washing machine and the standpipe. Here’s a little tip I’ve learned from years of fixing washers: grab a garden hose and run water through it. If the water flows smoothly from one end to the other, then your hose is clear. If not, you’ve found your blockage.
Inspect the Standpipe: Lastly, make sure the standpipe, the vertical pipe into which the washer drains, isn’t clogged. It’s like trying to pour water down a blocked sink – it just doesn’t work. A clogged standpipe can prevent proper drainage, leading to all sorts of headaches.
Cleaning the GE Washer Drain Pump

Alright, let’s roll up our sleeves and get to the pump. If your GE washer not draining issue persists, it might be time to check the pump.
Access the Pump: First, lay your washing machine on its back. This gives you a clear view of the drain pump. Think of it like looking under the hood of your car; you need a good angle to see what’s going on.
Disconnect the Pump: Carefully disconnect the pump. Look for a tab on the connector and give it a gentle push while pulling up to release the pump. It’s a bit like unlocking a tricky door; patience and a steady hand are key.
Inspect for Blockages: Now, let’s see if anything is blocking the pump. Look for any obstructions, like small clothing items, in the pump or the outlet hose. I remember once finding a tiny sock that had been causing all sorts of trouble. Clear out any debris you find.
Measure Resistance: Here’s where we get a bit technical. Use a multimeter set to resistance mode to measure the resistance between the pump’s terminals. A good pump should read between 15 to 30 ohms. If the reading is “OL” (open circuit) or significantly higher, then you’ve likely found the problem. The pump might be broken and need replacing.
Checking the Tub Outlet for Blockages
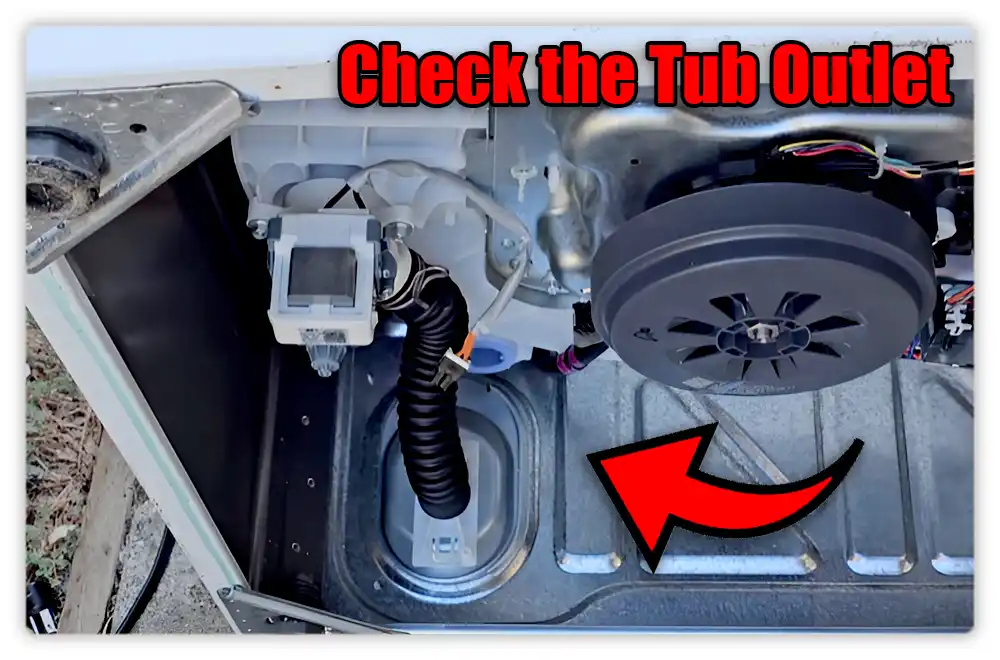
Now, let’s move on to the tub outlet. If your GE washer not draining is still a problem, the tub outlet might be the culprit.
Remove the Pump: First, you need to remove the pump. Grab a 3/8 inch nut driver to take out the bolts securing the pump. It’s a bit like unscrewing a jar lid – just take your time and be careful.
Inspect for Blockages: Once the pump is off, look inside for any obstructions. Small items like socks or lint can easily get stuck in there. I’ve seen everything from tiny toy cars to coins causing trouble. Clear out any debris you find.
Check the Outlet Hose: Finally, check the outlet hose for any blockages that might be restricting water flow. Make sure it’s clear from end to end. Think of it like checking a straw for blockages – you need to make sure water can flow freely through it.
Testing the GE Washer Control Board
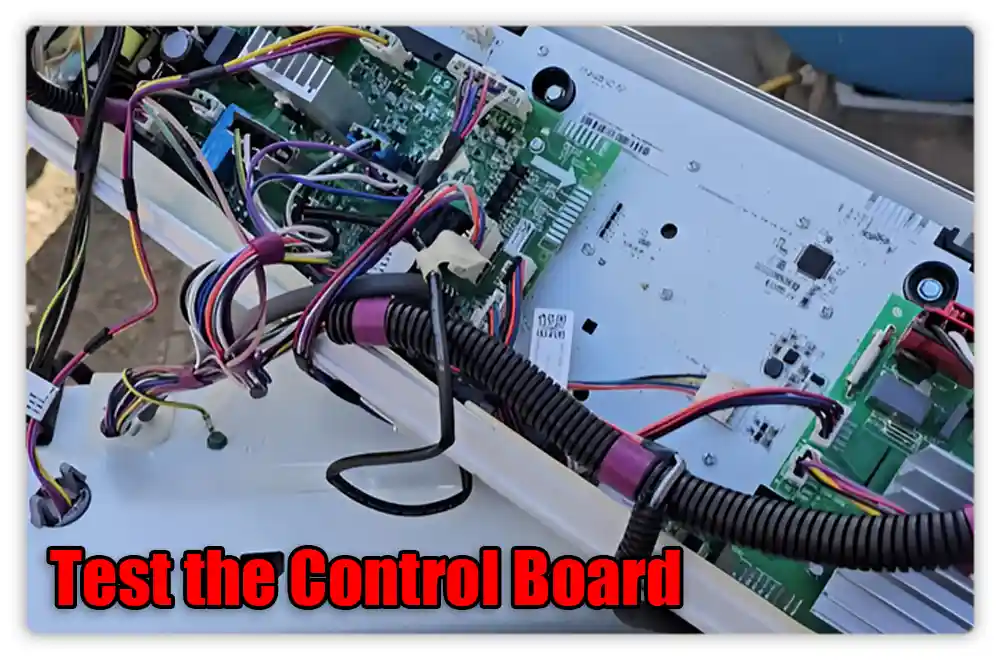
If your GE washer not draining issue persists, it might be time to test the control board. This might seem tricky, but don’t worry, we’ll go through it step by step together.
Access the Control Board: First, remove the cover of the control board by unscrewing the quarter-inch screws and sliding it out. It’s like opening a treasure chest, only this one holds the key to fixing your washer.
Safety First: Always make sure the washing machine is unplugged before you proceed with any electrical tests. Safety is paramount, and we don’t want any shocks here – only solutions.
Locate Connector J512: Identify the J512 connector on the control board. This is where you’ll test the voltage output. Think of it as finding the nerve center of your washer’s brain.
Measure Voltage: Set your multimeter to AC voltage mode. Reconnect the machine to power and set it to drain mode. Measure the voltage between pin 2 (purple wire) and pin 3 (white wire) of the J512 connector. The reading should be 120 volts. I remember the first time I did this; it felt like being a detective uncovering clues.
- 120 Volts Present: If the multimeter shows 120 volts, then the control board is functioning properly. This means we’re looking good so far, and the issue might be elsewhere.
- No 120 Volts: If there’s no voltage, the control board is likely faulty and may need replacement. This can be a bit of a bummer, but knowing what needs fixing is half the battle won.
By testing the control board, you can ensure that your GE washing machine not draining is thoroughly diagnosed.
Read More: Frigidaire Dishwasher Not Draining
Additional Tips
When your GE washer isn’t draining, a few extra tips can make troubleshooting easier. These pointers will help you handle the problem better and avoid extra hassle.
Draining Water from the Washing Machine
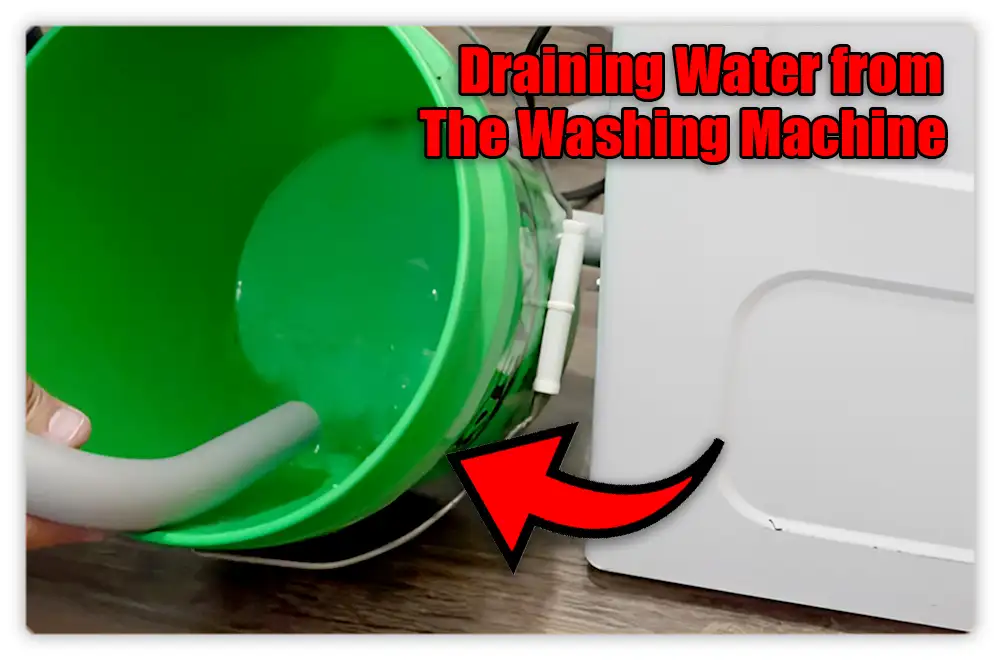
If your GE washer not draining has left it filled with water, don’t worry. The simplest way to drain it is to use a bucket. Lower the drain hose to the floor level, allowing the water to siphon out into the bucket. This process might take some time, but it will effectively remove the water.
I remember the first time I had to do this. My GE washing machine wouldn’t spin or drain, and I was faced with a drum full of water. It was late at night, and I was tired, but I knew I had to get it done. I grabbed a bucket, lowered the hose, and watched as the water slowly trickled out. It wasn’t fast, but it was steady. I had a moment to reflect on how such simple solutions can sometimes be the most effective.
Finding the Schematics or Service Manual
For a detailed inspection of your GE washer not draining issue, you might need the hidden technician’s manual. This guide is often tucked away under or behind the washing machine. Carefully tilt the machine to find the manual, usually stored in a plastic pouch. This manual is full of useful information, providing you with troubleshooting codes and detailed diagrams.
I remember the first time I had to find one of these manuals. My washer wasn’t working right, and I was frustrated. After some searching and a bit of effort, I found the manual behind the washer. It felt like discovering hidden treasure! The detailed diagrams and codes were so helpful, guiding me step-by-step to fix the problem.
Ensuring the Lid Switch is Working Properly
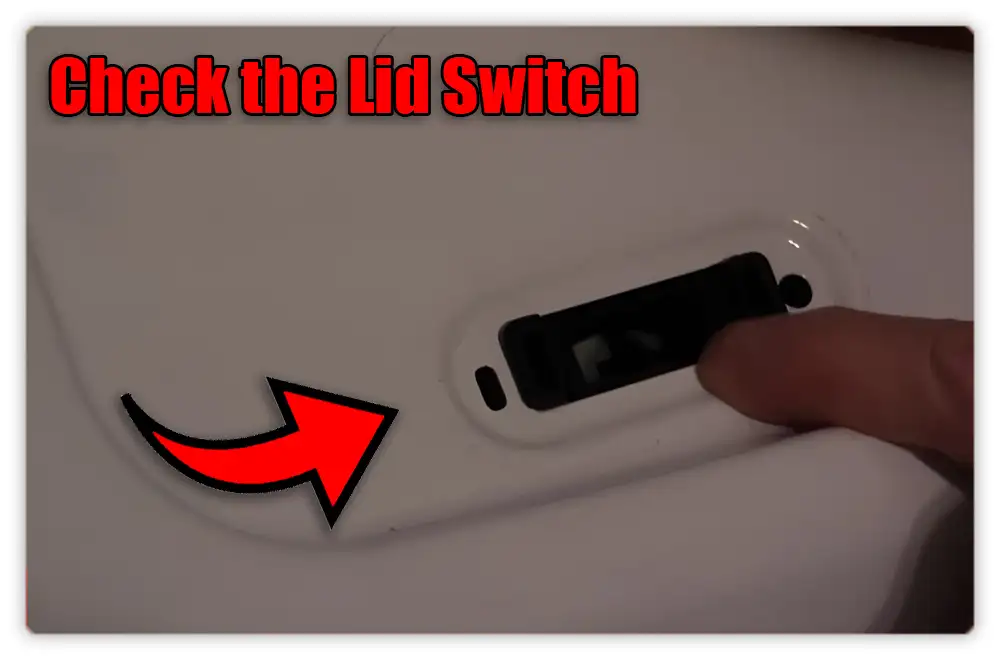
In top-load washers, a broken lid switch can stop the machine from moving to the drain or spin cycle. The lid switch, found under the lid, makes sure the lid is closed during use. To test it, press the switch with your finger and listen for a click. If you don’t hear a click or if the ‘lid closed’ light doesn’t come on (depending on your model), the switch might need to be changed.
I did this for a client once. Their washer wouldn’t drain, and after checking everything else, I looked at the lid switch. When I pressed it, there was no click. Changing the switch fixed the problem right away.
Read More: Maytag Washer Lid Lock Bypass
Case Study 1: GE Front Load Washer Not Draining
As an appliance repair expert, I received a call about a GE front load washer that wasn’t draining. The model was GE GFW450SSMWW, a popular washer known for its efficiency. However, this one had standing water after each cycle.
Initial Inspection
- Error Codes: The washer displayed error code E23, indicating a drain pump issue.
- Drain Hose: It was kinked and partially blocked, restricting water flow.
- Filter: The filter was clogged with lint and small items, impeding drainage.
- Drain Pump: The pump was making a humming noise but not pumping water.
Steps Taken to Fix the Problem
- Straightening the Drain Hose: I straightened the hose and cleared any obstructions.
- Cleaning the Filter: I removed and cleaned the filter thoroughly, ensuring no debris was left.
- Inspecting the Drain Pump: I checked the pump for blockages and found it was partially clogged.
- Testing the Pump: Using a multimeter, I found the pump motor was faulty.
- Replacing the Pump: I replaced the drain pump with a new one. This involved disconnecting the power, removing the old pump, and installing the new part.
Outcome
After reassembling the washer, it was tested and worked perfectly, draining all water as expected. I advised the customer to regularly clean the filter and check the hose to prevent future issues. They were happy to have their washer back in working order.
Case Study 2: GE Top Load Washer Not Draining or Spinning
A customer had issues with their GE top load washer, model GTW460ASJWW. It wasn’t draining or spinning.
Initial Inspection
- Error Codes: Displayed E1, indicating a drainage issue.
- Drain Hose: Found kinked and blocked, stopping water flow.
- Filter: Clogged with lint and debris.
- Lid Switch: Not engaging properly, preventing the spin cycle.
Steps Taken to Fix the Problem
- Straightened the Drain Hose: Cleared blockages.
- Cleaned the Filter: Removed and cleaned thoroughly.
- Fixed the Lid Switch: Adjusted to engage correctly.
- Tested the Drain Pump: Confirmed it was working well.
Outcome
The washer was reassembled and tested, working perfectly, draining and spinning as it should. Maintenance tips were provided to the customer to ensure smooth future operations.
When to Seek a Professional
Sometimes, fixing a GE washer not draining can be tricky. If you have tried all the steps and your GE washing machine won’t spin or drain, it might be time to call a professional. Here are a few signs that you need expert help:
- Persistent Issues: If your GE washer won’t drain just clicks or you still face problems after checking the hose, pump, and control board.
- Complex Electrical Problems: Electrical issues, especially those involving the control board, can be tricky and dangerous.
- Strange Noises: If your washer makes unusual sounds that you can’t identify, it could indicate a more serious problem.
- Leaks: Water leaks from the machine can cause damage to your home and indicate a deeper issue.
Knowing when to seek professional help can save you time and prevent further damage. If your GE washing machine not draining despite your best efforts, a professional can diagnose and fix the problem quickly. This ensures your washer gets back to working order without unnecessary stress.
Conclusion
Fixing a GE washer not draining can be simple with the right steps. By checking the hose, pump, tub outlet, control board, and lid switch, you can solve most issues. If problems persist, don’t hesitate to seek professional help.If you have any questions about your GE washer not draining, just comment below or contact me. I am ready to help!
FAQ
Why is my GE washer not draining?
Your GE washer may not be draining due to a clogged drain hose, faulty pump, or lid switch. Check these components for blockages or malfunctions.
How to fix a GE washer not draining?
First, check for clogs in the drain hose and pump. Clean out any debris. If problems persist, consult the manual or call a repair professional.
Why is my GE front-load washer not spinning?
Check for an unbalanced load or an improperly shut door. Also, inspect for a clogged drain hose or pump. If the problem persists, it may be a faulty control board, motor, or door lock.
How do I fix a clogged drain hose?
Unplug your washer and locate the drain hose. Detach it from the washer and the wall drain. Use a long brush or wire to clear any blockages. Rinse the hose with water to ensure it’s clear, then reattach it. Voila! Your washer should drain like a champ again. Remember, even your washer needs a little TLC sometimes!
When should I replace the drain pump?
Replace the drain pump if your washer isn’t draining or makes strange noises. Check for leaks or blockages first. If the pump still doesn’t work, it’s time for a new one. Trust your gut, and listen to your washer!

